Have you ever walked into a room and felt something was missing? Maybe your walls feel bare or lack that personal touch. This time of year, I find myself craving fresh and unique ways to brighten up my space. That’s why I created this post about DIY wall mirror decor ideas. Mirrors not only add light to a room, but they also create a sense of style and depth that can totally elevate your home.
If you’re someone who loves home decor but is also mindful about budget, this one’s for you. You don’t need to hire a designer or spend a fortune to achieve that professionally designed look. With just a little creativity, you can craft stunning wall mirrors that reflect your personality and charm. Whether you’re a seasoned DIYer or just getting started, these ideas will spark your imagination.
In this post, you’ll find over 30 ideas that are both affordable and stylish. From bohemian chic to modern minimalist designs, there’s something here for everyone. Each idea is not only beautiful but also practical, allowing you to make mirrors that fit perfectly in your space. Get ready to roll up your sleeves and transform your walls into a gallery of self-expression. Let’s dive in and discover how to make your home feel more like you!
1. Macrame Mirror Frame

Create a cozy, bohemian atmosphere with a macrame mirror frame. This project blends natural textures with a stylish mirror, making it a great addition to your teenage retreat.
Start by picking a round mirror. Choose macrame cord in colors that speak to you. You can find these materials at craft stores or online.
Now, let’s make some magic! Use simple knots to wrap the cord around the mirror’s edge. Don’t worry if you’ve never knotted before; there are plenty of tutorials online to guide you.
Want to add some flair? Try incorporating feathers or beads into your design. These little touches can elevate your mirror and make it truly unique.
Here are some tips to keep in mind:
Experiment with knots: Different knotting techniques can give your mirror a fresh look. A simple square knot or a more complex spiral knot can change the vibe completely.
Match your colors: Choose cords that blend well with your room’s theme. Earthy tones can create a calming atmosphere, while bright colors can energize the space.
Add greenery: Hang small plants around your mirror for a lively touch. This not only enhances the mirror but also brings a bit of nature indoors.
So, gather your supplies, get creative, and enjoy the process. Your macrame mirror will not only reflect your style but also become a stunning focal point in your room. Happy crafting!
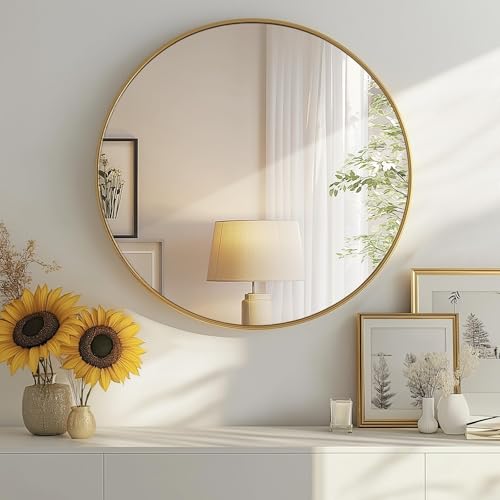


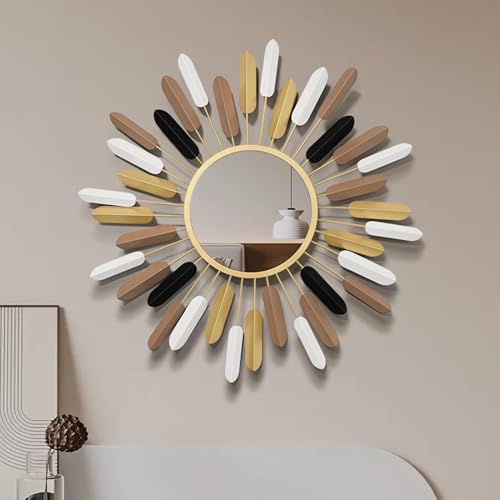
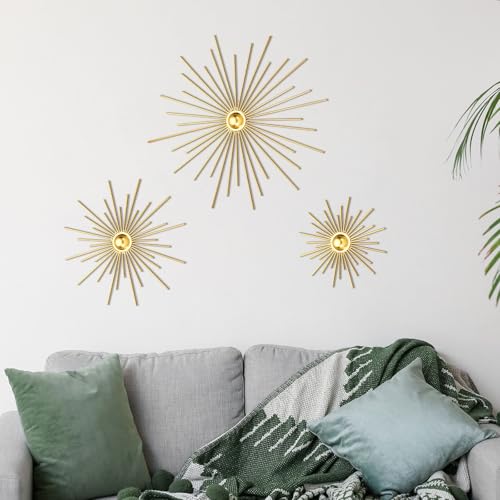
2. Sunburst Mirror

Are you looking for a way to add a touch of elegance to your home? A sunburst mirror might just be what you need! These mirrors are not only stylish but also bring a sense of energy to any space. Imagine how stunning it would look above your desk or dresser, catching the light and reflecting a warm glow.
Creating your own sunburst mirror is easier than you think. Start with a large round mirror as your centerpiece. Next, gather materials like painted wooden dowels or even colorful straws. Arrange them around the mirror to mimic sun rays.
Here are some tips to make your project shine:
Customization: You can paint the dowels in bright colors for a bold statement or leave them natural for a more bohemian vibe.
Easy Assembly: A hot glue gun makes putting it all together a breeze. Just apply glue to the ends of your dowels and attach them around the mirror.
Personal Touch: Want to make it unique? Mix in seashells, beads, or other small decorations. This adds character and reflects your style.
Placement Matters: Hang your sunburst mirror at eye level. This ensures it captures attention and becomes a true focal point in the room.
With just a little creativity and effort, you can craft a stunning sunburst mirror that looks as if it belongs in a designer showroom. So gather your materials and let your imagination shine!


3. Painted Geometric Mirror

Looking to add a modern touch to your space? A painted geometric mirror might be just what you need. This fun project is perfect for a teenager’s room, offering a mix of style and creativity.
Start by choosing a mirror with a unique shape, like an octagon or hexagon. Next, grab some painter’s tape. This tape will help you create bold patterns on the mirror’s frame. Think outside the box! You can mix colors and shapes to make your design truly one-of-a-kind.
Here’s a quick guide to get you started:
1. Pick Your Colors: Choose shades that pop against your wall. Bright colors can really make your mirror stand out.
2. Tape It Off: Use painter’s tape to outline the areas you want to paint. Get creative with your patterns—zigzags, stripes, or even triangles work well!
3. Paint with Care: Use paint that suits your frame material. Acrylic paint works great for most surfaces.
4. Let It Dry: Patience is key. Allow the paint to dry fully before removing the tape. This way, you’ll avoid smudges and achieve clean lines.
5. Enjoy Your Creation: Hang your mirror and admire your work! It’s a perfect way to show off your personality and style.
This DIY project not only enhances your decor but also boosts your creative skills. With just a few materials and a bit of imagination, you can create a stunning piece that looks professionally designed. So, roll up your sleeves and get started!
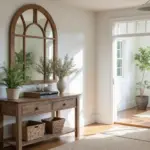
4. Vintage Window Frame Mirror

Looking for a unique way to refresh your space? A vintage window frame mirror can be your answer! This DIY project not only brings rustic charm to your room, but it also gives new life to old materials.
Start by hunting for an old window frame at your local thrift store or flea market. These frames often have character and stories to tell. Once you find one, clean it up and sand it down. This step is crucial for a smooth finish.
Next, pick a paint color that matches your decor. A coat of primer can help the paint stick better and ensure a vibrant hue. If you want your mirror to have a weathered look, consider distressing the wood. You can do this by lightly sanding the edges or using a special technique to create a worn effect.
Now it’s time to add the mirror panel. Measure your frame carefully and cut a mirror to fit perfectly where the old glass used to be. Once it’s in place, hang your stunning creation on a feature wall. This will draw eyes and become a conversation starter in your home.
Pro Tips:
– Hang the mirror at eye level for the best effect.
– Consider adding decorative hooks or accents around the mirror for extra flair.
– Use LED lights behind the mirror to create a soft glow.
With this vintage window frame mirror, you’ll not only enhance your space but also express your personal style. Get creative, and enjoy the process of making something beautiful!
5. Floral Wreath Mirror

Looking to add a touch of nature to your space? A floral wreath mirror is a charming way to bring the outdoors inside. This DIY project is perfect for teen rooms or any area that craves a fresh, vibrant feel.
Start by gathering materials. You’ll need a circular mirror, faux flowers, greenery, and some vines. Choose flowers that reflect your personality or mood. Do you love bright colors? Go for bold blooms! Prefer soft pastels? Select gentle hues.
Next, it’s time to create your wreath. Use hot glue to attach each floral piece around the mirror’s edge. Be sure to balance different types of flowers and greenery for a cohesive look. This technique not only makes your wreath visually appealing but also ensures it feels harmonious.
Consider changing the flowers with the seasons. For spring, use soft pinks and whites. In autumn, switch to warm oranges and deep reds. This simple change keeps your decor feeling fresh and in tune with nature.
For a softer, more romantic touch, stick with a circular mirror. Its shape complements the floral design beautifully.
With just a few supplies and a little creativity, you can craft a stunning floral wreath mirror that feels professionally designed. So, grab your materials and let your imagination bloom!
6. Metallic Fringe Mirror

If you’re looking to add some sparkle to your space, a metallic fringe mirror might be just what you need. This eye-catching decor piece can transform a simple mirror into a glamorous focal point, perfect for any room, especially for teens who love a bit of flair.
Start with a basic round or square mirror. Then, grab some metallic fringe or tassels that fit your style. You can choose classic shades like gold or silver, or opt for bold colors that pop against your wall.
Creating this mirror is simple. All you need is a glue gun and your chosen fringe. Here’s how to make it shine:
Mix Up the Lengths: Use different lengths of fringe for a fun, textured look. This adds depth and interest.
Perfect Placement: Hang your new mirror above a vanity, desk, or in a hallway to catch the light. It’s a great way to make small spaces feel larger.
Style It Right: Pair your fringe mirror with other metallic decor, like lamps or picture frames, to create a cohesive and stylish atmosphere.
Don’t worry if it feels a bit daunting at first. This project is all about your personal style. Have fun with it, and let your creativity shine!
With just a few materials and a bit of effort, your metallic fringe mirror can elevate any room and reflect your unique taste. So, get ready to impress your friends with this stunning DIY project!
7. DIY Terrarium Mirror

Looking for a way to brighten up your space? A DIY terrarium mirror could be the perfect project! This fun idea mixes the beauty of mirrors with the freshness of tiny plants, bringing a slice of nature indoors.
Start by picking a shallow frame. You can find these at craft stores or even repurpose an old picture frame. Inside the frame, create a small terrarium using layers of pebbles, soil, and small plants like succulents or air plants.
Here’s how to do it:
1. Layer it right: Begin with a layer of pebbles for drainage. This helps prevent water from sitting at the bottom and keeps your plants healthy.
2. Add soil: Place a layer of potting soil on top of the pebbles. Make sure it’s deep enough to support your plants.
3. Choose your plants: Select small, low-maintenance plants. Succulents are great because they don’t need much water and come in various shapes and colors.
4. Position your mirror: On the back side of your frame, attach a mirror. This will reflect the greenery, creating the illusion of a larger space and adding a pop of life to your room.
Pro tips:
– Make sure your terrarium gets indirect sunlight. Direct sunlight can harm your plants.
– Water sparingly. Overwatering is a common mistake. Just a little mist now and then will do.
– Keep it clean. Wipe down the mirror regularly to ensure it reflects beautifully.
This DIY project not only adds style to your decor but also gives you a little green sanctuary. Your terrarium mirror will surely become a conversation starter in your home!
8. String Light Mirror

Create a cozy atmosphere in your space with a string light mirror! This simple decor idea not only adds charm but also brightens up your room, making it feel warm and inviting.
To start, wrap string lights around the edges of your mirror. As night falls, these lights will cast a gentle glow, perfect for setting a relaxed mood. You can choose warm white lights for a classic look or go for colorful options to match your personality.
Here’s how to make it work:
1. Choose battery-operated lights. This gives you the freedom to place your mirror anywhere without worrying about outlets.
2. Consider adding a dimmer switch. This allows you to control the brightness, creating the perfect ambiance for any occasion.
3. Match the lights to your room’s theme. If you have a bohemian vibe, colorful lights could fit right in. For a minimalist look, stick with soft white lights.
This project is not just easy; it transforms your space in minutes. Plus, it’s a fun way to express your style.
So, gather your materials and brighten up your life with a stunning string light mirror!
Transform your teenage room into a cozy haven! With just a few string lights around your mirror, you can create a warm and inviting atmosphere that reflects your unique style.
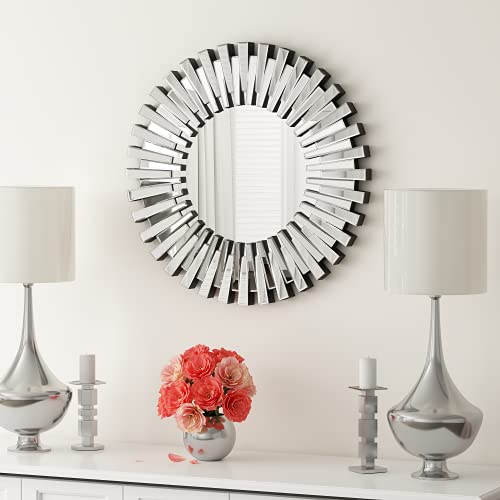
9. Bold Textured Mirror

Want to add a special touch to your space? A bold, textured mirror could be just what you need! This stunning piece not only reflects light but also showcases your personality.
Imagine a mirror framed with unique materials like clay, fabric, or wood. You can weave colorful fabric into fun shapes or mold clay into interesting designs. The possibilities are endless, and they allow your creativity to shine!
Here are some tips to get you started:
Mix Materials
Don’t hesitate to combine different textures. A wooden frame with fabric accents can create an eclectic look that stands out.
Choose Textures
Think about how different textures make you feel. Go for soft fabrics, rough wood, or shiny metal to create a vibe that resonates with you.
Check Stability
Make sure your base is strong enough to support the mirror’s weight. A sturdy frame will keep your creation safe and secure.
Get Inspired
Look online or in magazines for ideas. You might find designs that spark your imagination!
Personal Touch
Add personal elements like colors that match your decor or shapes that reflect your style.
By following these steps, you’ll create a mirror that looks professionally designed and feels uniquely yours. Get creative and have fun with it! Your DIY textured mirror will become a conversation starter in any room.
10. Upcycled CD Mirror

Do you have a pile of old CDs gathering dust? Why not turn them into a stunning wall mirror? This fun and eco-friendly project adds a touch of glamour to any space, especially for a teen’s room.
Start by cutting the CDs into various shapes. Think triangles, squares, or even funky designs. Then, grab a simple mirror frame and use glue to attach those shiny pieces. The reflective surfaces will play with the light, creating an enchanting display that catches everyone’s eye.
Here’s why this project is great: it’s not just creative, but also a fantastic way to recycle. You’ll feel good knowing you’re giving new life to materials that would otherwise end up in the trash.
Tips for success:
– Mix and match shapes: Try different sizes and forms for a one-of-a-kind look.
– Add variety: Use other materials like beads or shells to enrich your design.
– Choose the right spot: Hang your mirror where it can reflect natural light. The more light it catches, the more dazzling it will look.
This DIY project is simple and rewarding. So gather those old CDs and get started on your unique mirror today! You’ll be amazed at how something so easy can bring so much style to your space.
11. Rattan Mirror

Transform your space with a stunning rattan mirror! This unique decor piece adds a warm, bohemian vibe to any room. Plus, it’s an easy DIY project that leaves you with a beautiful, personalized touch.
Start with a simple mirror as your base. From there, you can create a lovely rattan frame. Use natural rattan or similar materials for that authentic look. Try weaving the rattan around the mirror or crafting a sunburst design for extra flair.
Here’s how to make it special:
1. Choose Your Colors: Paint the rattan in your favorite shades. This personal touch can make your mirror truly stand out.
2. Style with Nature: Pair your rattan mirror with live plants or woven baskets. This combination fosters a cohesive bohemian style that feels inviting.
3. Secure It Well: Ensure the rattan is attached firmly to your mirror. This keeps it safe and sound, avoiding any mishaps.
This project is not only fun, but it also allows you to express your creativity. You don’t need to be an expert; just follow these steps and enjoy the process.
By adding a rattan mirror to your home decor, you’ll create a space that feels both stylish and warm. So, grab your materials and get started! Your walls will thank you.


12. Chalkboard Mirror

Looking to add a splash of creativity to your space? A chalkboard mirror could be just what you need! This fun piece serves two purposes—it’s not only a mirror but also a blank canvas for your thoughts and ideas.
Imagine stepping into your room and seeing a space where you can write uplifting quotes, leave reminders, or even sketch doodles. It’s an interactive way to express yourself and personalize your decor.
To create your own chalkboard mirror, start with a basic mirror. Apply chalkboard paint around its edges. This will give you a designated area for your notes and drawings.
Here are some tips to make the most of your chalkboard mirror:
Choose a unique shape: Go for a round, heart, or geometric design to make it stand out.
Hang it in a strategic spot: Place it where you’ll see it daily—like near your desk or entryway.
Use colorful chalk: Bright colors can add energy and cheer to your messages.
Keep it clean: Use chalk that wipes off easily, so you can switch your messages effortlessly.
With this stylish addition, you’ll not only enhance your room but also inspire yourself and others every day! So grab your materials and start creating. Your walls are waiting for a touch of your personality!


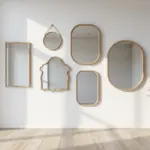
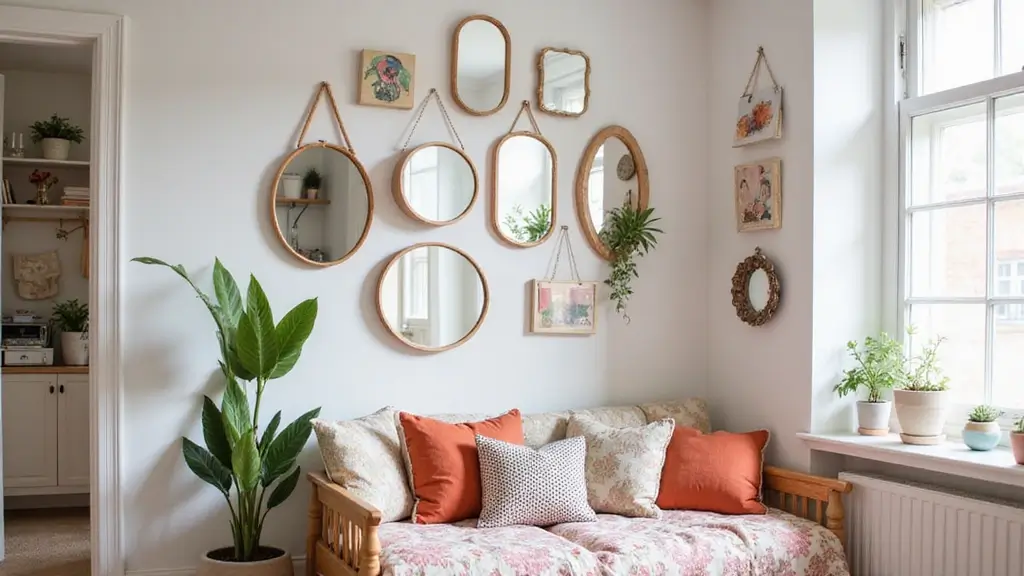
13. Layered Mirrors

Layered mirrors are a fantastic way to add style and depth to your walls. If you’re looking to make a small room feel larger, this decor idea can work wonders.
Here’s how you can create your own layered mirror display. First, gather mirrors in various sizes and shapes. Think about mixing round and square mirrors for an interesting look. You can even choose frames with different finishes to add more character.
Before you start hanging, lay the mirrors out on the floor. This allows you to play with the arrangement until you find a setup you love. You might want to create a symmetrical pattern or go for a more random, eclectic vibe.
Once you have your design, secure the mirrors to the wall. Make sure they are firmly attached to prevent any accidents. If you want to avoid damaging your walls, consider using strong wall adhesive.
Here are some tips:
– Measure carefully: Ensure the mirrors fit well in your chosen space.
– Use a level: This will help keep everything straight.
– Consider lighting: Position mirrors to reflect light, which can brighten up your room.
With these ideas and tips, you can create a stunning layered mirror display that looks like it came from a designer showroom. Get creative and enjoy the process!
14. Color Block Mirror

Want to brighten up your space? A color block mirror is the perfect way to add personality and flair! This fun DIY project lets you show off your style while making your room more inviting.
Start with a plain mirror. Grab some painter’s tape and block off sections of the frame. You can choose any colors that match your room’s vibe. Think about the mood you want to create. Soft pastels can feel calming, while bright colors can energize the space.
Here’s how to get started:
1. Choose Your Colors: Pick a palette that speaks to you. Use complementary colors for a balanced look, or go bold with contrasting shades.
2. Tape It Up: Carefully apply painter’s tape to create the shapes you want. You can stick to traditional blocks or try unique patterns like stripes or chevrons.
3. Paint with Care: Use a small brush for precision. Apply your first color and let it dry completely before moving on to the next. This step is important to avoid smudges.
4. Remove the Tape: Once everything is dry, gently peel off the tape. Take your time to avoid pulling off any paint.
5. Hang and Enjoy: Position your new mirror in a spot where it catches light and reflects your style.
With just a little time and creativity, you can turn a simple mirror into a stunning focal point. Happy decorating!
15. Fabric-Covered Mirror

Looking to add a touch of warmth and personality to your home? A fabric-covered mirror might be just what you need! This simple DIY project allows you to blend art and function, making your space feel cozy and inviting.
Start by picking a fabric that resonates with you. Think about colors and patterns that reflect your style. Whether it’s a chic floral print or a bold geometric design, the choice is yours! Once you have your fabric, lay it flat and place the mirror frame on top.
Next, stretch the fabric over the frame. Use a hot glue gun to secure the edges. This step is crucial; a tight fit will keep your fabric looking smooth and neat. Remember, a fabric with a bit of stretch makes this process easier.
Want to take it a step further? Consider layering fabrics. You can create depth by using two or more different textiles. For instance, start with a solid base and add a patterned overlay.
Lastly, make sure everything is firmly attached. This prevents any sagging or lifting. A well-made fabric mirror can be a stunning focal point in any room.
With just a little time and creativity, you’ll have a unique piece that looks professionally designed. So gather your materials, and let your imagination run wild!
16. Mosaic Mirror

Mosaic mirrors can add a splash of creativity and color to your space! If you’re looking to refresh a dull wall, this DIY project invites you to unleash your artistic side.
Start by gathering materials like broken tiles, glass shards, or even colorful paper. The beauty of mosaic art is that you can mix and match these items to create a design that reflects your personality.
First, choose a basic mirror as your base. Then, sketch out a pattern on paper. This step helps you visualize your design before you start working. Once you have your plan, begin adhering the pieces around the mirror using strong glue.
Let’s break down some helpful tips for a successful project:
Protect Your Hands: Always wear gloves to keep your hands safe from sharp edges.
Plan Your Design: Having a clear layout will help your mosaic flow better and look more professional.
Sealing It Up: After your pieces are set, use a grout sealer to protect your artwork. This also gives it a polished finish.
Creating a mosaic mirror is not just about the end product. It’s also a fun process where you can experiment with colors and textures. So gather your materials, and get ready to make a unique piece that can brighten any room! Your creative touch will surely impress everyone who sees it.
17. Shadow Box Mirror

Looking to add a touch of personality to your space? A shadow box mirror is a fun way to do just that! This creative project not only serves as a mirror but also displays your favorite treasures. It’s an eye-catching addition that sparks conversation.
To make your own shadow box mirror, start with a shadow box frame. Attach a mirror to the back of the frame. This gives you the perfect space to showcase small items, like cherished photos, postcards, or even tiny plants. The combination of your reflection and personal mementos creates a warm, inviting atmosphere.
Here are some practical tips to get started:
Choose lightweight items
Use small treasures that won’t weigh down your frame. This keeps everything tidy and prevents your mirror from tipping over.
Plan your layout
Before you glue anything, play around with the arrangement of your items. This way, you can find the perfect look that reflects your style.
Hang it in a prime spot
Place your shadow box mirror on a feature wall. This not only highlights the piece but also makes it a focal point in the room.
Creating a shadow box mirror allows you to blend style with sentiment. It’s a simple project that can make a big impact in your home decor. So gather your favorite items and let your creativity shine!
18. Colorful Bead Fringe Mirror

Brighten up your space with a colorful bead fringe mirror! This fun and lively decor piece adds a touch of bohemian style to any room, especially a teen’s sanctuary. It’s not just eye-catching—it can be a personal expression of creativity.
To start, grab a simple mirror. You can find one at a thrift store or use one you already own. Next, gather strings of colorful beads. Think about using wooden or acrylic beads in different colors to create a vibrant look.
Here’s how to make it:
1. Attach the Beads: You can either glue the beads around the mirror’s edge or create a playful fringe at the bottom. Use fishing line for a nearly invisible attachment. This keeps the focus on your beautiful beads.
2. Choose Your Colors: Pick shades that match or complement your room’s decor. Whether you choose bright hues or soft pastels, make sure they resonate with your style.
3. Mix Sizes: Use beads of various sizes. This adds depth and interest, making the mirror stand out even more.
This project is quick and can transform a plain mirror into a stunning focal point. You don’t need a lot of time or experience to create something amazing.
So, gather your materials and get started! You’ll enjoy a lovely new piece that reflects your personality and style. Plus, it’s a great conversation starter when friends come over. Happy crafting!
19. DIY Hanging Mirror

Hanging mirrors can transform your space and add a touch of charm. They sway gently in the breeze, creating a unique vibe perfect for a bohemian look. Plus, they offer a fun way to play with light and reflection.
To start, choose a mirror with a simple frame. This keeps the focus on the mirror itself. Next, attach it to a sturdy cord or chain. You can hang it from the ceiling or use a wall bracket for a floating effect.
Want to add flair? Decorate the cord with beads or colorful fabric. This extra touch makes your mirror a true standout piece.
Here are some tips to ensure your DIY hanging mirror is safe and stylish:
Secure Attachment: Make sure the mirror is firmly attached to prevent any accidents.
Location Matters: Hang it over a vanity or bedside table. This way, it’s easily accessible for last-minute checks before heading out.
Shape Selection: Choose a mirror shape that speaks to your style. Round mirrors can soften a space, while geometric shapes add a modern touch.
With these steps, you’ll create a beautiful hanging mirror that looks professionally designed. Enjoy the process and let your creativity shine!


20. Layered Frame Mirror

Creating a layered frame mirror is an excellent way to add a unique touch to your space. This project not only beautifies your room but also lets your creativity shine. You can combine different materials like wood, metal, and plastic frames to create an eye-catching piece of art.
Start by gathering frames of various sizes and styles. Look for wood frames for a classic feel, metal frames for a modern twist, or colorful plastic frames for a playful vibe. You can paint the frames in colors that complement your room’s decor or leave them natural for a rustic look.
Here are some practical tips to get started:
1. Secure the frames well. Make sure each frame is tightly attached to avoid any shifting. You want your mirror to look polished and professional.
2. Balance the layers. Arrange your frames in a way that feels harmonious. Experiment with different placements before securing them.
3. Vary the widths. Using frames of different widths adds depth and interest. This mix creates a more dynamic visual effect.
As you work on this project, let your imagination guide you. Feel free to explore various color schemes and styles. The result will be a stunning layered frame mirror that reflects your personal style and creativity. Enjoy the process, and watch your space come alive!
21. DIY Neon Mirror

Looking to add a splash of fun and personality to your space? A DIY neon mirror could be just what you need! This trendy decor piece not only brightens up your room but also gives it an edgy vibe that’s perfect for teens and young adults alike.
Start by selecting a basic mirror. You can use an old one or buy a simple, affordable option. Then, grab some colorful neon LED strip lights. These lights are easy to find online or at home improvement stores.
Next, outline the mirror’s edges with the LED strips. This creates a glowing frame that instantly catches the eye. You can even get creative! Write your favorite quotes or draw fun shapes using the lights. This personal touch makes your mirror truly unique.
Here are some tips to make your project easy and enjoyable:
Choose battery-operated lights. They’re convenient and eliminate the need for complicated wiring.
Pick colors that reflect your style. Whether you love bright pinks or cool blues, make it yours!
Secure the lights properly. Use adhesive clips or tape to keep everything neat and tangle-free.
With a little effort, you’ll have a stunning neon mirror that becomes the focal point of your room. Enjoy the glow and let your creativity shine!
22. Rustic Wood Slice Mirror

Looking to brighten up your space? A rustic wood slice mirror could be just the thing to add warmth and character to any room. This charming piece not only reflects your style but also brings a touch of nature indoors.
Start with a basic round or square mirror. Surround it with wood slices to create a stunning frame. You can even mix in wood beads or twigs for added texture. This project is perfect for anyone who loves the great outdoors and wants to infuse that vibe into their home.
Here are some tips to make your DIY project shine:
Vary Your Wood Slice Sizes: Use different sizes of wood slices. This creates a layered effect that draws the eye and makes the mirror more interesting.
Seal the Wood: Don’t forget to seal the wood slices. A clear sealant protects them from moisture and keeps them looking fresh for years.
Try a Two-Tone Finish: Want a modern twist? Paint some slices in a contrasting color. This adds a contemporary flair while maintaining the rustic feel.
This DIY project is not just fun; it’s also an affordable way to create a unique piece of decor. Plus, it’s a great conversation starter when friends come over. So gather your materials, unleash your creativity, and let that mirror reflect your personal touch!
Next time you look into your rustic wood slice mirror, you’ll see more than just your reflection—you’ll see your love for nature and creativity come to life.
23. Floating Shelf Mirror

Add a touch of elegance and practicality to your space with a floating shelf mirror! This clever decor choice serves two purposes: it looks great and helps you save space.
Imagine a stylish mirror with a small shelf right underneath. You can use that shelf to showcase your favorite trinkets or a lush little plant. Hang it above your desk or bedside table to make the most of every inch.
This unique piece not only enhances your room but also reflects your personal style. Here is why you’ll love this idea:
1. Personal Touch: Decorate the shelf with items that matter to you. Whether it’s a photo, a decorative candle, or a tiny succulent, these details make the mirror truly yours.
2. Practicality: You can keep essentials close at hand. Place your keys or a small clock on the shelf for easy access.
3. Material Choices: Think about using materials like wood or metal for a modern vibe. If you prefer something sleek, glass can really elevate the look.
4. Weight Considerations: Make sure your shelf can handle what you want to display. Check the weight limits before hanging.
This floating shelf mirror is a simple yet effective way to blend function with style. So grab your tools, and let’s get started on this fabulous project!
You’ll love how it transforms your space.
24. Twine-Wrapped Mirror

A twine-wrapped mirror adds a charming touch to any space. It’s a fantastic way to introduce a rustic vibe without spending a fortune. If you’re looking for an easy DIY project that transforms your decor, this is it!
Start by selecting a round or square mirror. The shape is up to you, but both options can look stunning. Next, grab some twine from your local craft store. This simple material can create a cozy, inviting atmosphere in your room.
Now, let’s get to the fun part. Begin wrapping the twine around the mirror’s frame. You can keep it straightforward for a clean look or mix it up with patterns for added flair. Secure the twine with a glue gun as you go. This keeps everything in place and ensures a neat finish.
Want to add a bit of color? Consider painting the twine before wrapping it. This allows you to match it perfectly with your room’s color scheme.
When it’s time to hang your masterpiece, choose a spot with good lighting. This will help showcase the texture and details of your twine-wrapped mirror.
With just a few supplies and a little time, you can create a stylish decor piece that looks professionally designed. So roll up your sleeves and get started on this delightful project today!
Your home deserves a touch of your personality, and this mirror is a perfect way to express it. Enjoy the process and watch how it brightens up your space!
25. Custom Painted Mirror

Are you looking to add a personal touch to your home decor? A custom-painted mirror is a fun and creative way to do just that! This project lets you showcase your artistic flair while creating a unique piece that fits your style.
Start with a simple, basic mirror. You can find these at thrift stores or online. Grab some acrylic paints in colors you love. Let your imagination run wild! You can paint bold patterns, inspirational quotes, or even a serene landscape. The choice is yours!
Here are some tips to get you started:
1. Use painter’s tape. This helps you achieve clean, sharp lines for your designs. It’s especially useful if you want to create geometric patterns or stripes.
2. Seal your artwork. Once your masterpiece is dry, apply a clear coat to protect it. This will keep your design looking fresh and vibrant for a long time.
3. Think seasonal. You can paint designs that reflect different times of the year. Imagine a cozy fall theme with leaves or a bright summer design with flowers. This way, you can change the look of your mirror whenever you want!
Creating a custom-painted mirror not only enhances your space but also gives you a sense of accomplishment. Plus, it makes for a great conversation starter! So why wait? Grab your supplies and start painting your way to a more personalized home!
26. Wooden Crate Mirror

Want to give your space a unique touch? A wooden crate mirror could be just what you need! This stylish project blends rustic charm with a modern vibe, making it a perfect addition to any room.
To start, find a wooden crate that suits your style. You can paint it in a color that matches your decor or leave it natural for that earthy look. Either way, it will grab attention!
Next, securely place a mirror inside the crate. This is key to keeping it safe and preventing any accidents. Make sure the mirror fits snugly and is well-supported.
Now, let’s talk about placement. Hang your new wooden crate mirror in a spot where it can shine. A well-chosen location will showcase its unique design and reflect light beautifully, making your room feel brighter.
Here’s a tip: Consider adding some decor around the mirror. Small plants, framed photos, or lights can enhance its appeal.
This DIY project is not just about looks; it’s also functional. You get a practical mirror that adds character to your home.
So, are you ready to create your own wooden crate mirror? Let your creativity flow and make it a centerpiece of your space!
27. Woven Wall Mirror

Looking to add some charm to your space? A woven wall mirror could be just what you need. This trendy piece brings texture and warmth to any room, making it perfect for a bohemian vibe.
Start with a simple mirror as your base. Then, grab some natural fibers like jute or rope. Weaving these materials around the mirror creates a stunning organic look. You can choose colors that fit your style, whether you prefer earthy tones or something brighter.
Here are some helpful tips as you create your woven wall mirror:
1. Choose a Strong Base: Make sure your mirror is sturdy enough to support the woven fibers. This ensures your work lasts and looks great.
2. Mix Fiber Thickness: Varying the thickness of the fibers can add depth and interest. Thicker strands can make bold statements, while thinner ones can fill in gaps nicely.
3. Find the Perfect Spot: Once your mirror is ready, hang it above a dresser or in a cozy lounge area. This placement not only showcases your creation but also adds an artistic flair.
This DIY project is a fun way to express your creativity. Plus, it’s a fantastic conversation starter. So, gather your materials and let your imagination run wild! Your woven wall mirror will not only brighten your space but also reflect your unique style.
Next time someone walks into your room, they’ll be captivated by your beautiful, hand-made decor. And who knows? You might inspire them to create their own!
A woven wall mirror isn’t just decor; it’s a statement! Infuse your teenage room with warmth and charm by embracing natural fibers – your space deserves that bohemian touch.
28. DIY Mirror Collage

A DIY mirror collage can add a unique touch to your home, reflecting your personality and style. This project not only brightens your space but also allows you to showcase your creativity.
Start by gathering a variety of mirrors in different shapes and sizes. Think round, square, or even abstract forms. This mix creates visual interest and makes your wall a true statement piece.
When you’re ready to hang, arrange the mirrors on your floor first. This way, you can play with different patterns until you find one that feels right. Remember, the goal is an artistic and eclectic look!
Here are some tips to make your project easier:
Use removable adhesive: This lets you change the arrangement easily if you want to try something new later.
Mix sizes: Combining large and small mirrors creates a layered effect that draws the eye.
Vary finishes: Consider mirrors with different frames or no frames at all. This adds depth and character to your collage.
Keep in mind that balance is key. You want your mirrors to complement each other while still standing out.
Lastly, don’t be afraid to experiment. A mirror collage can be as simple or complex as you wish. Enjoy the process and let your creativity shine!
A mirror collage is more than decor – it’s a canvas for your creativity! Mix shapes and sizes to reflect your unique style and brighten up your teenage room in a snap.
29. DIY Light Box Mirror

Looking to add a modern touch to your space? A DIY light box mirror might be just what you need! This stylish decor piece combines a mirror with glowing panels, giving your room a contemporary flair.
To create your own light box mirror, start by building a simple frame. Use LED strip lights behind a frosted glass panel, placing a mirror at the front. This setup not only reflects your image but also lights up the room, making it a dual-purpose item that’s both functional and eye-catching.
Imagine how this unique design can transform your space. It adds a dramatic effect that can elevate the mood in any room.
Here are some practical tips to ensure a successful project:
Choose the Right Materials: Make sure to pick materials that can handle the heat from the lights. This keeps everything safe and working well.
Adjustable Lighting: Want to set the mood? Add a dimmer switch to control the brightness. You can switch from bright light for tasks to a soft glow for relaxation.
Strategic Placement: Hang your mirror in a spot where it can bounce light around the room. This way, you maximize its impact and functionality.
With just a little effort, you can craft a stunning light box mirror that looks like it came straight from a design showroom. Get creative and enjoy the process!
30. Interactive Magnetic Mirror

Give your home a fun twist with an interactive magnetic mirror! This project lets you use magnets to refresh and personalize your mirror whenever you like. It’s simple and perfect for anyone wanting to add a dash of creativity to their space.
To start, grab a frameless mirror. You’ll want to create magnetic art pieces that you can swap out easily. Think about small pictures, fun shapes, or inspiring quotes. Each time you change them, it’s like getting a brand-new mirror!
This DIY project not only looks great but also allows you to express yourself. You can match your mirror decor to your mood, the season, or even a special event.
Here’s how to make it happen:
1. Choose Light Materials: Use materials like lightweight cardstock or foam for your magnetic pieces. This keeps them easy to move around.
2. Create Thematic Sets: Think about a few different themes. You might have a spring set with flowers or a winter set with snowflakes. This way, you can switch them based on the season or your mood.
3. Strong Magnets: Make sure the magnets you use are strong enough to hold the pieces securely. You don’t want them falling off when someone walks by!
With just a few materials and a little creativity, you can make your mirror a lively part of your home. So, gather your supplies, and let your imagination run wild! You’ll have a mirror that reflects not just your image but also your personality.
Conclusion

DIY wall mirror decor is a fun and creative way to express yourself in your teenage room! Each of these ideas offers a unique way to bring your personal style to life while enhancing your space.
Whether you go for bohemian vibes or modern chic, the options are endless for creating a mirror that’s uniquely you.
So grab your tools and start crafting your own fabulous mirror wall decor today!
Frequently Asked Questions
What are some easy DIY mirror projects for teenage room decor?
If you’re looking to spruce up your teenage room with some DIY mirror projects, consider creating a bohemian-style mirror using twine, beads, or even natural elements like dried flowers. You can also try painting a basic mirror frame in vibrant colors to add a pop of personality. Another fun idea is to use multiple smaller mirrors in creative arrangements to form a unique mirror wall decor display that reflects your style!
How can I create a bohemian mirror wall decor on a budget?
Creating a stunning bohemian mirror wall decor doesn’t have to break the bank! Start by visiting thrift stores or garage sales for affordable mirrors. You can also use DIY techniques to upcycle old mirrors with paint or decorative elements like macramé or fabric. Adding string lights around the mirrors can also enhance the aesthetic without costing much—it’s all about creativity and resourcefulness!
What are some creative wall mirror ideas for a teenage room?
For a teenage room, think outside the box with your wall mirror ideas. Consider using a large round mirror surrounded by colorful tassels or a cluster of geometric mirrors for a modern look. You could even create a gallery wall that mixes mirrors with your favorite artwork and photos, providing both functionality and a personal touch to your space!
How do I hang mirrors safely and securely in my room?
Hanging mirrors safely is crucial, especially in a teenage room. Use wall anchors or screws designed for the weight of your mirror, and always make sure it’s level. For larger mirrors, consider using a mirror adhesive for extra security. If you’re unsure, you might want to consult with a parent or guardian to ensure everything is hung safely for a worry-free decor experience!
What are the benefits of using mirrors in teenage room decor?
Using mirrors in your teenage room decor can have several benefits! They can create the illusion of more space, making your room feel larger and more open. Mirrors also reflect light, brightening up the space and adding depth to your decor. Plus, with the right DIY mirror projects, you can showcase your personality and style while also serving as practical accents for getting ready each day!
Related Topics
home decor
DIY mirror projects
teenage room decor
bohemian style
affordable decor
wall mirror ideas
creative accents
easy DIY
budget friendly
modern decor
personalized decor
room makeovers